Warehouse Sale Happening Now! 10% Off All In-Stock Goods
December 2: The Christmas Gift
December 2: The Christmas Gift
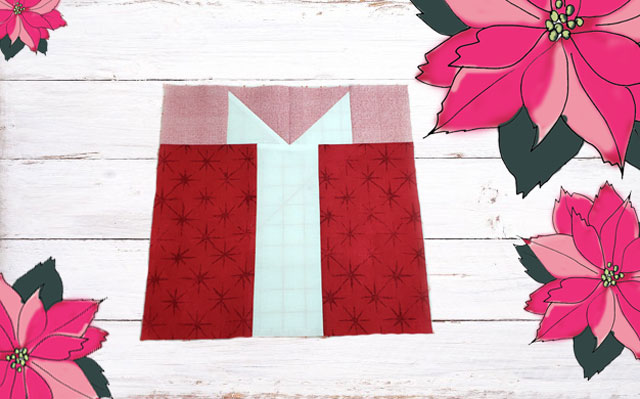
 Hi everyone! My name is Becky Thompson from the YouTube channel “Power Tools With Thread” and a blog by the same name. I am so honored to be part of Moda’s Countdown to Christmas 2020 quilt! This is a great quilt block if you are a beginner quilter or if you are teaching the next generation of quilters. It is a very simple block that is cut down to size at the end so everything fits just right. It’s layer cake friendly so you can make an entire quilt using this cute Christmas gift block. The unfinished block measures 12.5″ x 12.5″.
![]() 1 - 10" x 10" square for the "wrapping paper" (Fabric A) 1 - 10" x 10" square for the "ribbon and bow" (Fabric B) 1 - 10" x 10" square for the background (Fabric C)
1 - 10" x 10" square for the "wrapping paper" (Fabric A) 1 - 10" x 10" square for the "ribbon and bow" (Fabric B) 1 - 10" x 10" square for the background (Fabric C) ![]() Choose which block will be your “wrapping paper” (Fabric A) and cut it in half so you have two 5″ x 10″ rectangles. Set aside.
Choose which block will be your “wrapping paper” (Fabric A) and cut it in half so you have two 5″ x 10″ rectangles. Set aside.

From Fabric B cut one 3 1/2″ x 10″ rectangle and one 4″ x 4″ square.

From Fabric C (background), cut one 4″x4″ square and two 3 5/8″ squares.

Let’ make the “package”. Sew the 3.5″x10″ Fabric B rectangle between the two pieces of Fabric A to create a ribbon that goes down the middle of your package. It should measure 12.5" wide.

Now for the bow. Draw a diagonal line on one of the 4″x4″ B or C squares.

Place the two 4″ x 4″ squares from fabrics B and C right sides together (RST) and sew them together stitching 1/4″ away on both sides of your drawn diagonal line.

Cut the block you just sewed in half on the drawn line to create two half square triangles (HSTs). Press the seams in different directions: one to the dark side and one to the light. This will help them nest together when sewn.

Align your “bow” pieces so they will align on top of your package properly and sew them together in the middle making sure you have a 1/4″ seam where they meet at the bottom of the bow.

Sew a Fabric C background square to each end of the bow. The finished unit will be a bit longer than your package but that’s OK because we’ll trim it down in a bit. Sorry, I missed the image of this unit before it was sewn but you can see it ready to sew below.

On your “package” piece, fold the sides together matching the ribbon seams and create a finger press crease to mark the center. You can also do this with a ruler if you like.

Now lay the bow section face down on the package matching the center seam of your HSTs to your newly marked crease. I like to pin going in one side of the seam and coming out on the other. I also like to give myself a guideline using a Frixion pen so I hit the point exactly. Stitch together making sure to stitch directly on the bottom of the “V” where the HTSs meet.

Open and iron flat. Now trim the sides of the background to match the edges of the package.

Using the top of your package as a starting point, trim off the bottom edge of the package so it measures 12 1/2″ x 12 1/2″.

All done! It’s ready to go under the tree!

These blocks are so easy and so fun you can make several of them into a cute table runner or maybe even an entire quilt! ![]() This block finishes at 12" x 12". These blocks are so easy and so fun you can make several of them into a cute table runner or maybe even an entire quilt! Becky Thompson powertoolswiththread.com
This block finishes at 12" x 12". These blocks are so easy and so fun you can make several of them into a cute table runner or maybe even an entire quilt! Becky Thompson powertoolswiththread.com ![]() NOTE FROM CHEF BECKY: This pattern has been corrected from the earlier version. If you made the incorrect size earlier, all is not lost! You can add (2) 3.5" x 12" strip to each side and (2) 3.5" x 18.5" strips to the top and bottom to yield an 18.5" unfinished block for your quilt. Apologies for my mistake!
NOTE FROM CHEF BECKY: This pattern has been corrected from the earlier version. If you made the incorrect size earlier, all is not lost! You can add (2) 3.5" x 12" strip to each side and (2) 3.5" x 18.5" strips to the top and bottom to yield an 18.5" unfinished block for your quilt. Apologies for my mistake!

Comments