Welcome to Moda!
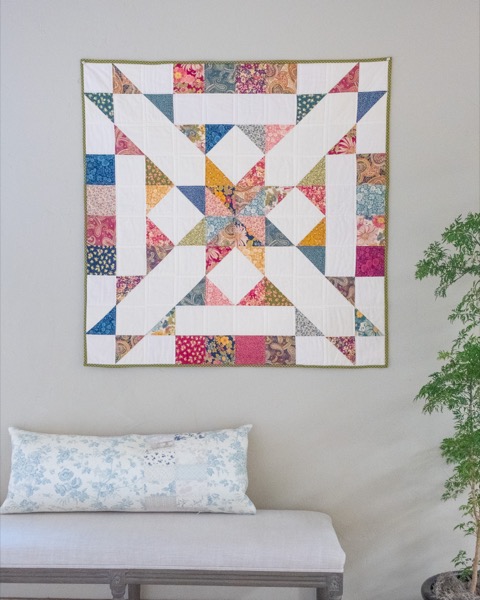
Charmed, I’m Sure: A Free Quilt Pattern Bursting with Summer Charm
Charmed, I’m Sure: A Free Quilt Pattern Bursting with Summer Charm
Published:
Jun 23 2025 - 12:39
Download the FREE pattern here → Charmed I'm Sure Quilt Pattern
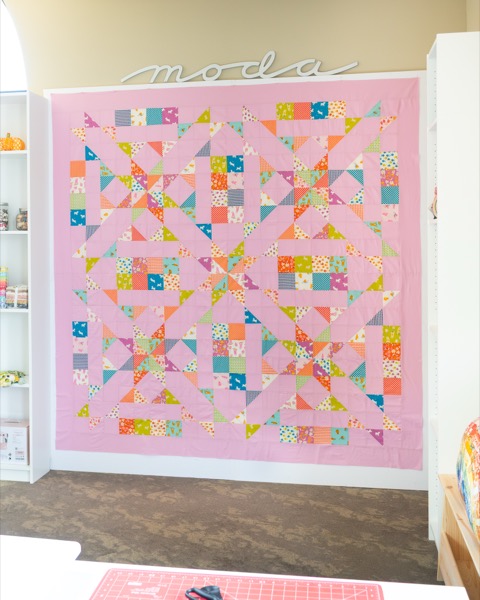
(Fabrics used above: Chelsea's Garden and Bella Solids - 98 Charm Packs)
We’re kicking off Moda’s Summer Charm Series with a burst of color, charm, and creative energy! The “Charmed, I’m Sure” quilt is the first of three FREE charm pack patterns we’ll be releasing on the last weekends of June, July, and August.
Whether you're sewing from your stash or grabbing your favorite new charm pack, this project is quick, beginner-friendly, and surprisingly versatile. One block is great for a wall hanging or baby quilt—but make four and you’ve got the start of something queen-sized and spectacular.

(Fabrics used above: Animal Animal Charm Pack and Bella Solids Primrose - 451)
What You’ll Need
- (1) Charm Pack (or 40 assorted 5" squares)
- 1¼ yards background fabric (or 2 Bella Solids charm packs — 24 squares will be leftover)
- ⅜ yard binding
- 2¾ yards backing
- Batting: 50" × 50"
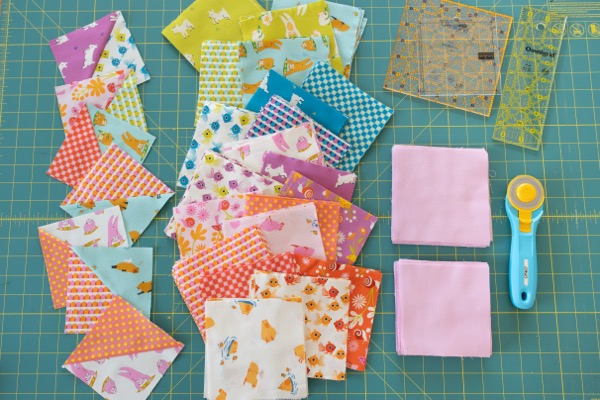
Step 1: Choose and Cut
Start by sorting through your charm squares. You'll need:
- (24) 5" squares for half square triangles (HSTs)
- (16) trimmed to 4½" squares for your layout
From your background, cut:
- (20) 5" squares
- (40) 4½" squares
(Fabrics used above: Animal Animal Charm Pack and Bella Solids Primrose - 451)
If you are unsure of how to make HSTs (half square triangles) please check out the video below, we will walk you through the process step-by-step.
Pro Quilter Tip: A rotating cutting mat and square ruler will help make the trimming process a breeze!
Step 2: Make Half Square Triangles (HSTs)
Pair (20) background squares with (20) print squares.

Draw a diagonal line on the back of the background square, sew ¼" away from both sides, cut on the line, and press toward the print.

Repeat the process with (2) pairs of print squares to make (4) print/print HSTs.

Trim all HSTs to 4½" square.
Quick Tip: Press for Success

Let’s talk seams. While we know not everyone is thrilled about pressing seams open, we highly recommend it for this project—at least on the HSTs.
Why? Open seams give you the most flexibility when laying out your block and allow those intersections to lie flatter. Once your HSTs are pressed, you can alternate directions when assembling rows to help your seams nest cleanly.
Step 3: Layout & Design
Now the real fun begins—laying out your block!
You’ll be working with:
- (40) background/print HSTs
- (16) trimmed 4½" print squares
- (4) print/print HSTs
- (40) 4½" background squares

There’s no single right way to approach your layout. Here are a few ideas to get you started:
- Block your colors together to create bold movement or radiating corners.
- Focus on symmetry, mirroring certain prints or hues diagonally across the block.
- Go totally scrappy and let the fabric dance however it falls!

Lay your block out on a design wall, the floor or large table, then stand back and squint. That’s the real test of balance!
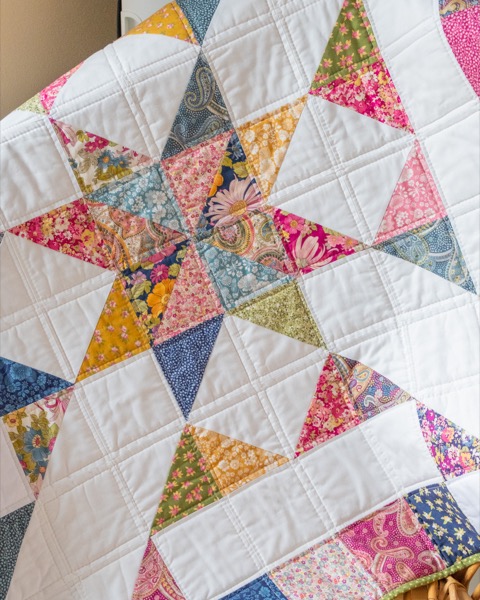
Once you’re happy with the arrangement, sew into 10 rows of 10 squares. Press odd rows in one direction and even rows in the other so your seams will nest as you assemble the quilt top. Press your final seams open or to one side—whatever helps it lay flat.
Step 4: Finish It Up
Layer with batting and backing, quilt as desired, and bind using your favorite method.
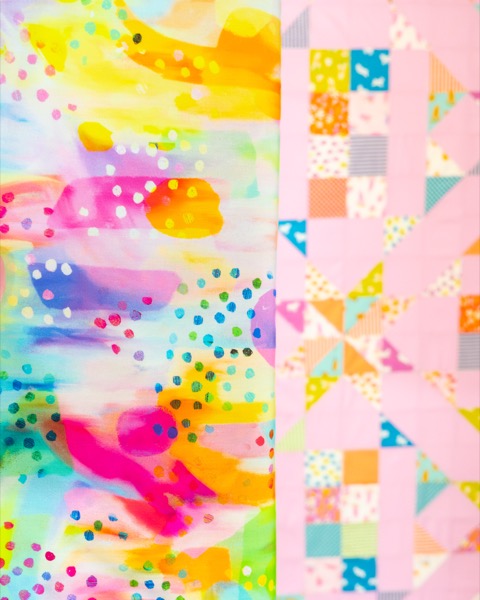
(Annie is using a print from the Gradient Auras collection to back her project!)
Simple straight-line quilting along the seams is perfect for this pattern, but it’s a great canvas for free-motion quilting if that’s your thing. The sample quilt was made in an afternoon using a domestic machine and straight line quilting--we just love the look!
(Fabrics used above: Chelsea's Garden and Bella Solids - 98 Charm Packs)
Want to Go Bigger?
This block scales beautifully. Make four identical quilt tops using this pattern and rotate them to create a dynamic 80" x 80" design.
For a clean center finish, swap out one corner background square on each mini quilt for a print/print HST. You can stop there and your quilt will measure 80” x 80”.
If you add a 5" border on all sides and you’ll have a fabulous queen-sized quilt measuring approximately 90" x 90". Additional supplies and info below!
Charmed I’m Sure Queen Size Fabric Requirements
- (4) Charm Packs (or a Layer Cake sub-cut into 5” Squares)
- 5 yards background fabric
- ¾ yard binding
- 2 ¾ Yards of Moda Wideback Backing Fabric.
- Border: Cut (7) 5½" strips from 1¼ yards
Prefer the look of a single block layout, just bigger?
Try using a Layer Cake (10" squares) instead of a Charm Pack and double the block components accordingly. With the same layout and construction, your quilt will finish at approximately 90" x 90"—no additional border needed!
Join the Summer Charm Series
“Charmed, I’m Sure” is just the beginning! This project is part of our Moda Summer Charm Series—featuring free patterns built around charm packs, released the last weekend of June, July and August!
Each one is easy to make, beginner-friendly, and full of charm (literally). Be sure to follow along and share your projects using #ModaSummerCharmQAL (and tag us on social media) so we can celebrate your summer makes.
Posted in:
Comments